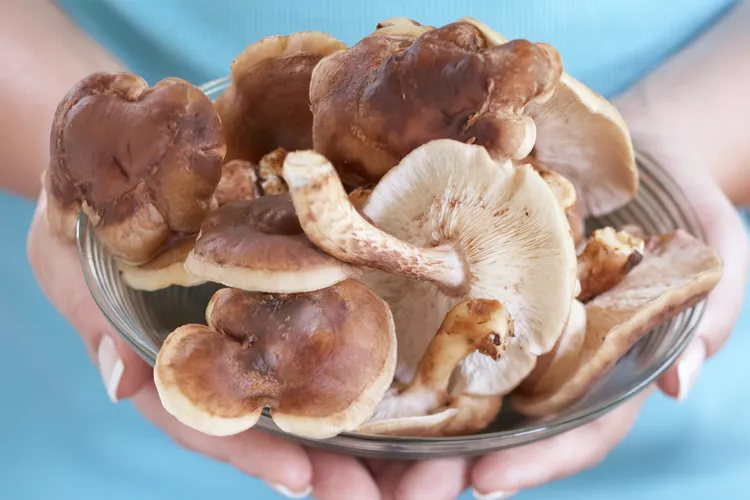
How to Grow Shiitake Mushrooms at Home

You might be surprised to hear that growing shiitake mushrooms (Lentinula edodes) is easier than growing most crops, although there is unique up-front work you won’t encounter elsewhere. The process involves gathering appropriate logs, inoculating them with shiitake spawn (a fungus), and sealing them so they don’t dry out. Then, the logs sit in a shady spot, and you moisten them during dry spells. Otherwise, they’re on their own.
Patience is necessary because it takes 6 to 14 months before the shiitakes start producing, but once they do, the inoculated logs bear delicious mushrooms for at least four or five years. That’s a considerable return on your initial investment of effort, and no weeding or pest control is needed.
How to Grow Shiitake Mushrooms at Home
Getting started is pretty simple. You need some fresh hardwood logs, plug spawn (hardwood dowels impregnated with shiitake spores and available from numerous online suppliers), a drill with an appropriately sized bit, and some food-grade wax for sealing the holes. Follow these steps:
1. Gather the logs.
Shiitake mushrooms grow best on oak, but other hardwoods such as elm, sweet gum, maple, and alder also work well. Harvest logs in winter while they’re still dormant. Fresh, dormant trees contain an abundance of sugars and nutrients that support shiitake growth. Don’t use logs that have been lying on the ground; they must be freshly harvested. The logs need to be about 4 to 6 inches in diameter and 3 to 4 feet long. This size is easy to handle while giving the mushrooms enough substrate. The logs should be well covered in bark. One reason oak is a favored wood for growing shiitakes is that its bark persists for a long time, which helps reduce the invasion of other fungi.
Allow the logs to rest for a couple of weeks, and then soak them in a large tub of water for a full day. They are now ready for inoculation.
2. Inoculate the logs.
Using a drill with a 3/8-inch bit, drill 1 ¼ -inch deep holes into the logs, making a clear mark on your drill bit to be sure you drill to the appropriate depth. Space the holes 5 to 6 inches apart in a row all the way down the log. Then, move about 6 inches around the log and make another row starting halfway between the first two holes so they create a diamond pattern. Continue drilling holes in rows until you are back where you started. When you’ve made the holes all around the log, it’s time to insert the plugs.
With a hammer or mallet, gently tap the plugs in place. They should fit snugly in the drilled holes. Dab some melted wax (paraffin or cheese wax) over the opening of each hole to seal it. The wax keeps moisture in and prevents other fungi from entering. Finally, label the log with the date. If you add more inoculated logs to your “shiitake farm” in future years, you will know which ones are the oldest and when to replace them.
3. Set the logs in the shade.
Find a shady spot in your yard and set the logs slightly off the ground (use bricks or stone for the bottom logs). If you prepared several logs to ensure a generous supply of mushrooms, place two on the bottom and the next two across the ends of the first two. Continue stacking the logs in pairs, keeping the center open.
Now, it’s up to the shiitakes to colonize the logs with their mycelium. If you experience a dry spell or live in an area with low rainfall, the logs will benefit from extra moisture. Give them a soaking spray every week or two.
4. Harvest and enjoy the shiitakes.
After 6 to 12 months or so, the fruiting bodies (the mushrooms) begin to appear on the surface of the logs, first as rounded buttons. These quickly develop into full-sized shiitakes in a few days. Fruiting usually follows a good soaking rain. Once mushroom production has begun, you can induce fruiting by soaking the logs in a large tub of cool water for a day. The best fruiting occurs in spring and fall; the fungus may need to rest in between. However, continue to check the logs. A flush of new mushrooms might appear a few days after a summer shower.
Harvest the mushrooms promptly as soon as they reach a decent size. Use them immediately for a delicious treat, or store them in the fridge for a few days. You may find that you are harvesting mushrooms faster than you can use them. If this happens, place the extras in a dehydrator and dry them to add to winter stews, pasta dishes, soups, and casseroles. Store the dried mushrooms in glass jars.